4. Create the product
Setup → Products/Services → Create Product. Give it a name and a group, choose type VPS/Dedicated and module Proxmox VE, set the prices and save. The Proxmox settings open on the product's edit page.
Auto setup
Auto Setup decides when the server is built: when the order is paid (the usual choice), when the order is placed, or only when an admin accepts the order.
The Proxmox VE virtual servers card reads its lists live from the cluster — pick the server in Lists from at the top right. The summary line above the sections always shows what one order gets.
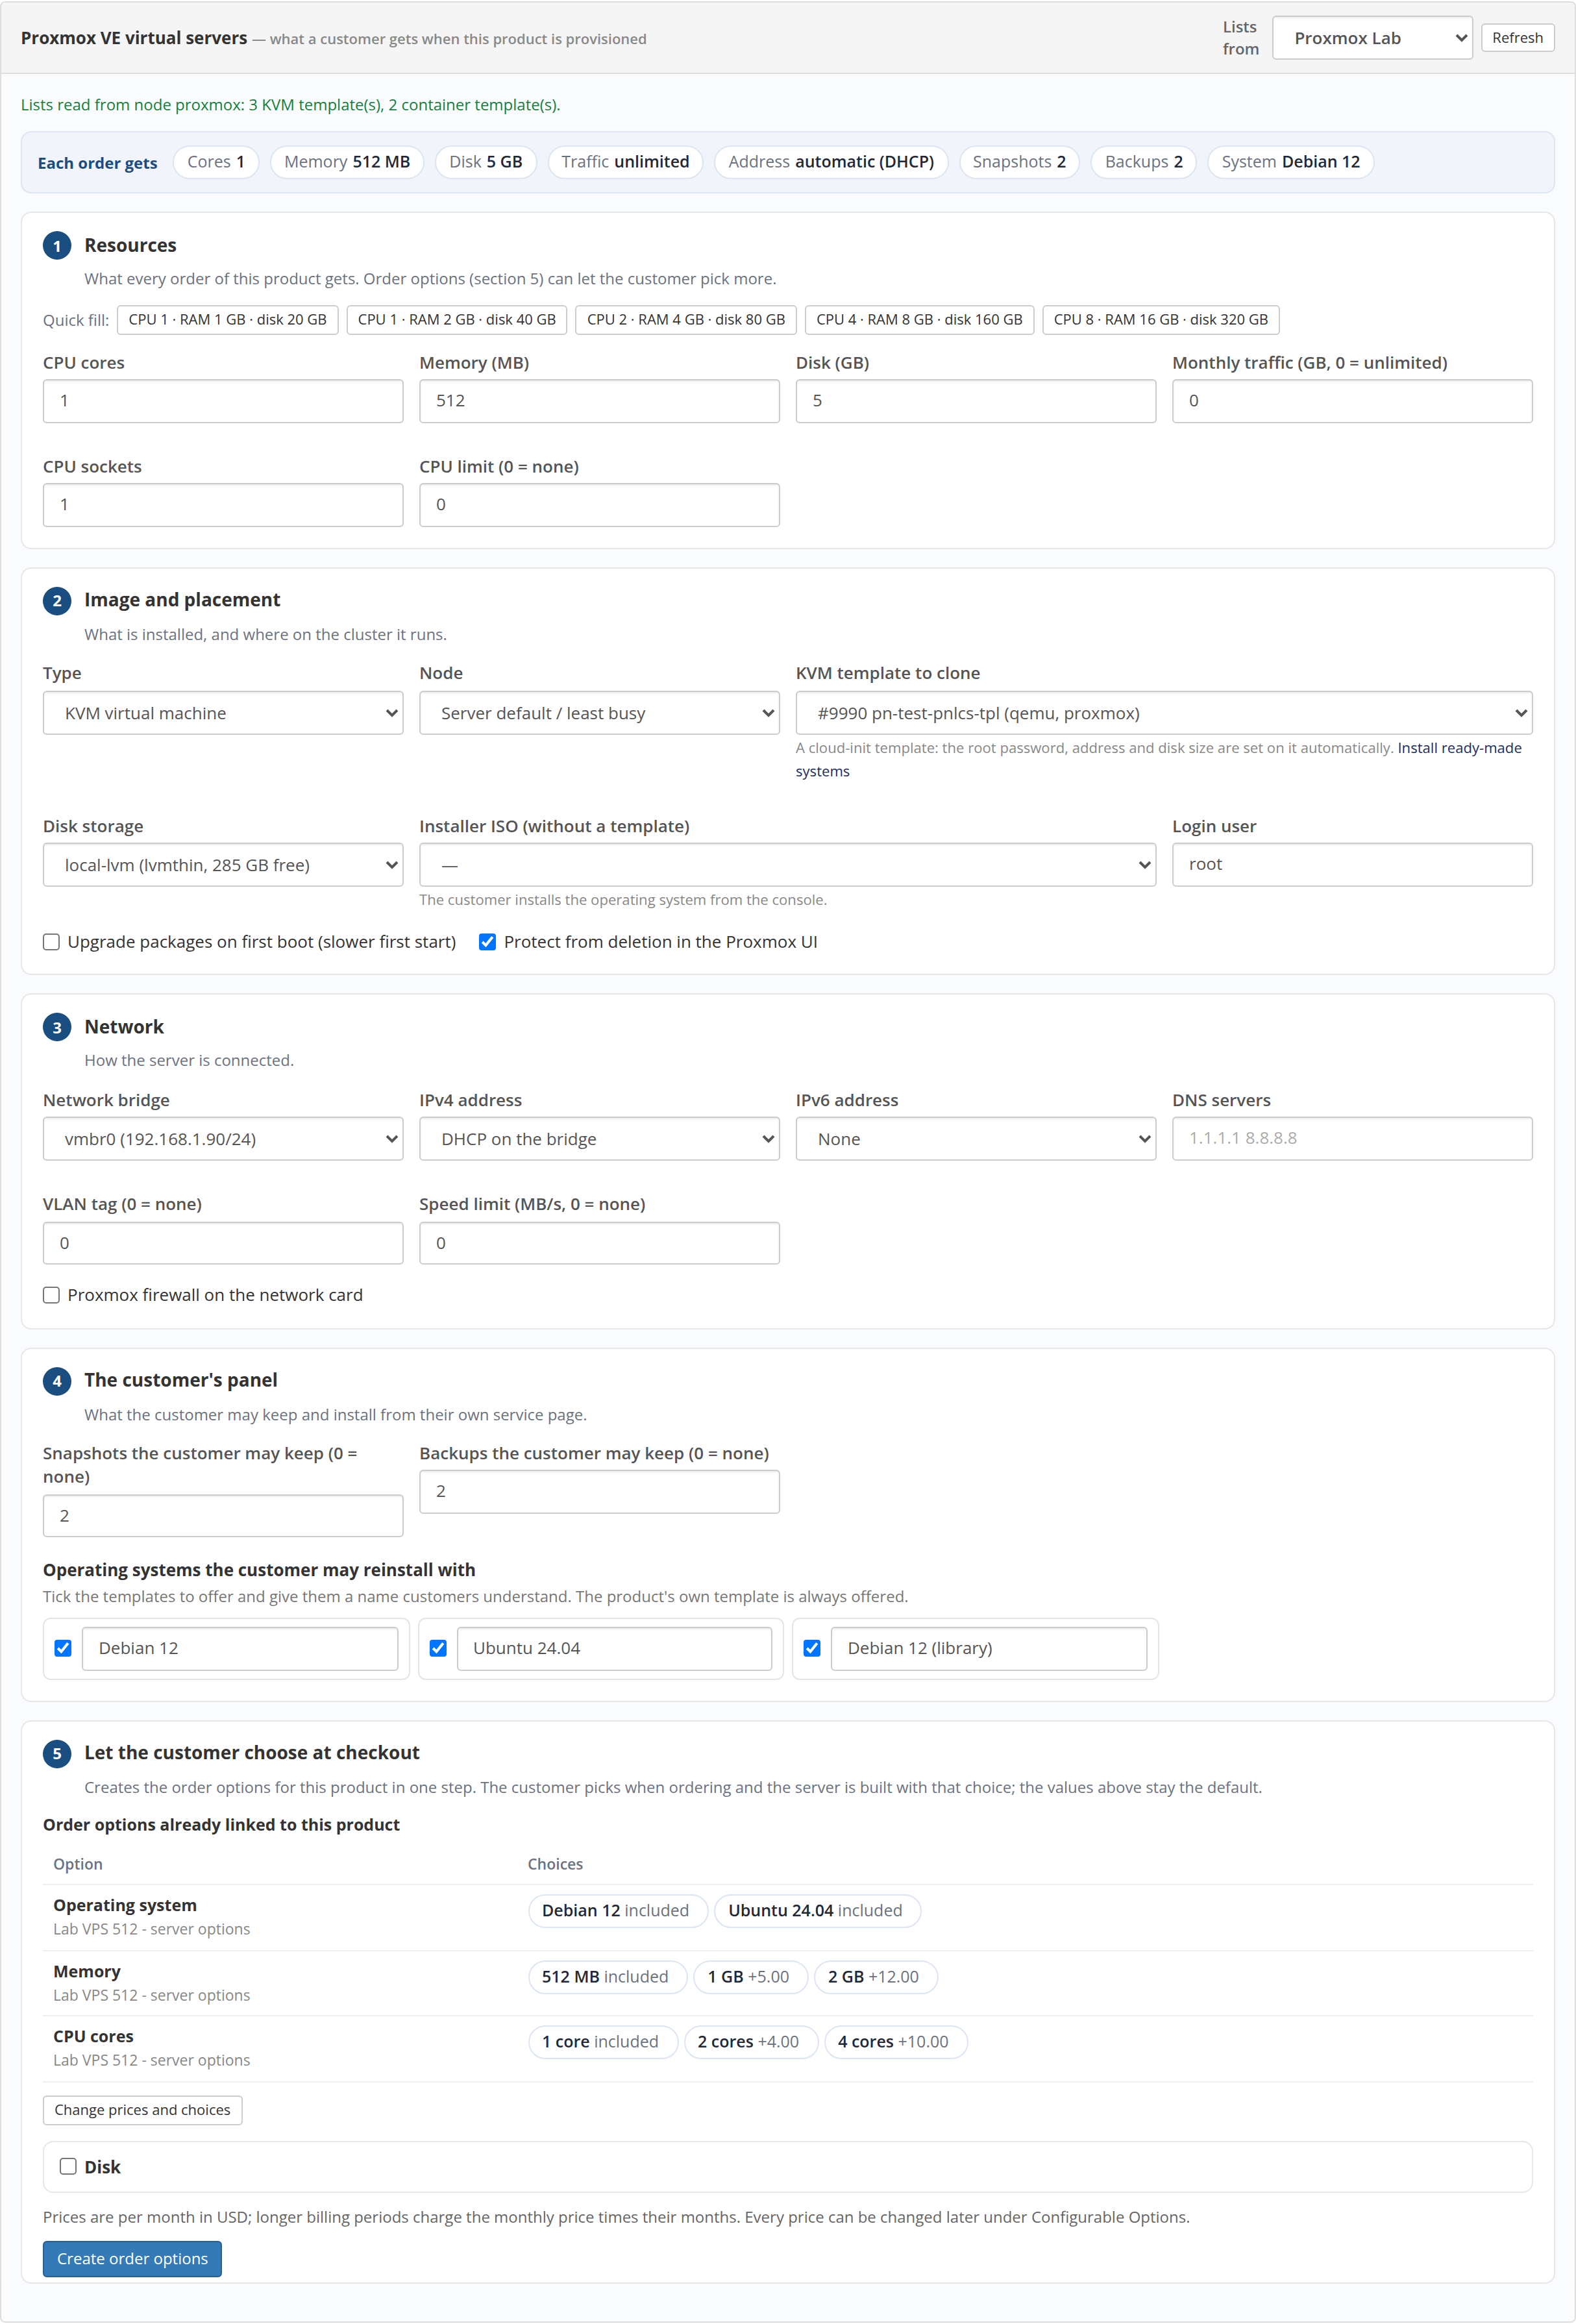
1 · Resources
| Field | Meaning |
|---|---|
| CPU cores | vCPUs of each server |
| Memory (MB) | RAM; 1024 = 1 GB |
| Disk (GB) | Size of the system disk. The template's disk is grown to this; it is never shrunk |
| Monthly traffic (GB) | Shown to you and the customer as a limit; 0 = unlimited. Usage is read from Proxmox every hour |
| CPU sockets | KVM only; leave at 1 unless you know you need more |
| CPU limit | Caps the server to this many cores' worth of time (0 = no cap), e.g. 0.5 for half a core |
| Swap (MB) | LXC only |
Quick fill sets cores, memory and disk to a common size in one click.
2 · Image and placement
| Field | Meaning |
|---|---|
| Type | KVM virtual machine or LXC container |
| Node | A fixed node, or Server default / least busy |
| KVM template to clone | The template new servers are copied from. Install ready-made systems under it opens the image library |
| Container template | LXC only: the vztmpl the container is created from |
| Disk storage | Where the new server's disk goes |
| Installer ISO | Instead of a template, boot an installer (see the note) |
| Login user | The user cloud-init creates; root by default |
| Upgrade packages on first boot | cloud-init runs the system's upgrade once; the first start is slower |
| Nesting | LXC only: allows Docker inside the container |
| Protect from deletion | Proxmox's protection flag, so nobody deletes the server by accident in the Proxmox UI. PNLCS lifts it only while terminating |
3 · Network
| Field | Meaning |
|---|---|
| Network bridge | The bridge servers are plugged into, listed from the node |
| IPv4 address | DHCP on the bridge, or one from the server's IPv4 pool (each server gets its own fixed address) |
| IPv6 address | None, or SLAAC |
| DNS servers | Given to the server through cloud-init, e.g. 1.1.1.1 8.8.8.8 |
| VLAN tag | Puts the network card on a VLAN (0 = none) |
| Speed limit (MB/s) | Caps the network card (0 = none) |
| Proxmox firewall | Turns on Proxmox's firewall for the card; the rules themselves are yours to set in Proxmox |
4 · The customer's panel
| Field | Meaning |
|---|---|
| Snapshots the customer may keep | 0 hides snapshots from the customer |
| Backups the customer may keep | 0 hides backups; also needs a backup storage on the server |
| Operating systems the customer may reinstall with | Tick the templates to offer and give each a name customers understand. The product's own template is always offered |
5 · Let the customer choose at checkout
Tick what the customer may pick when ordering — operating system, memory, CPU cores, disk — edit the choices and their extra monthly price, and press Create order options. PNLCS creates the configurable options, links them to the product and shows them in a table. Longer billing periods are charged the monthly price times their months (quarterly = 3×, annually = 12×…).
The values in sections 1–4 are the default; a choice made at checkout
replaces them for that order. Prices can be changed later under
the Configurable Options page (linked from Change prices and choices), where the options appear as, for example,
memory|Memory with choices 2048|2 GB — the part before | is what the
module reads, the part after is what the customer sees.
Writing options by hand
The same convention works for options you create yourself. The keys the
module understands are os, memory, cores, disk, swap,
bandwidth, rate, snapshots and backups. A quantity option sets
the number itself, e.g. cores|CPU cores with the quantity the customer
types.
What the customer sees when ordering
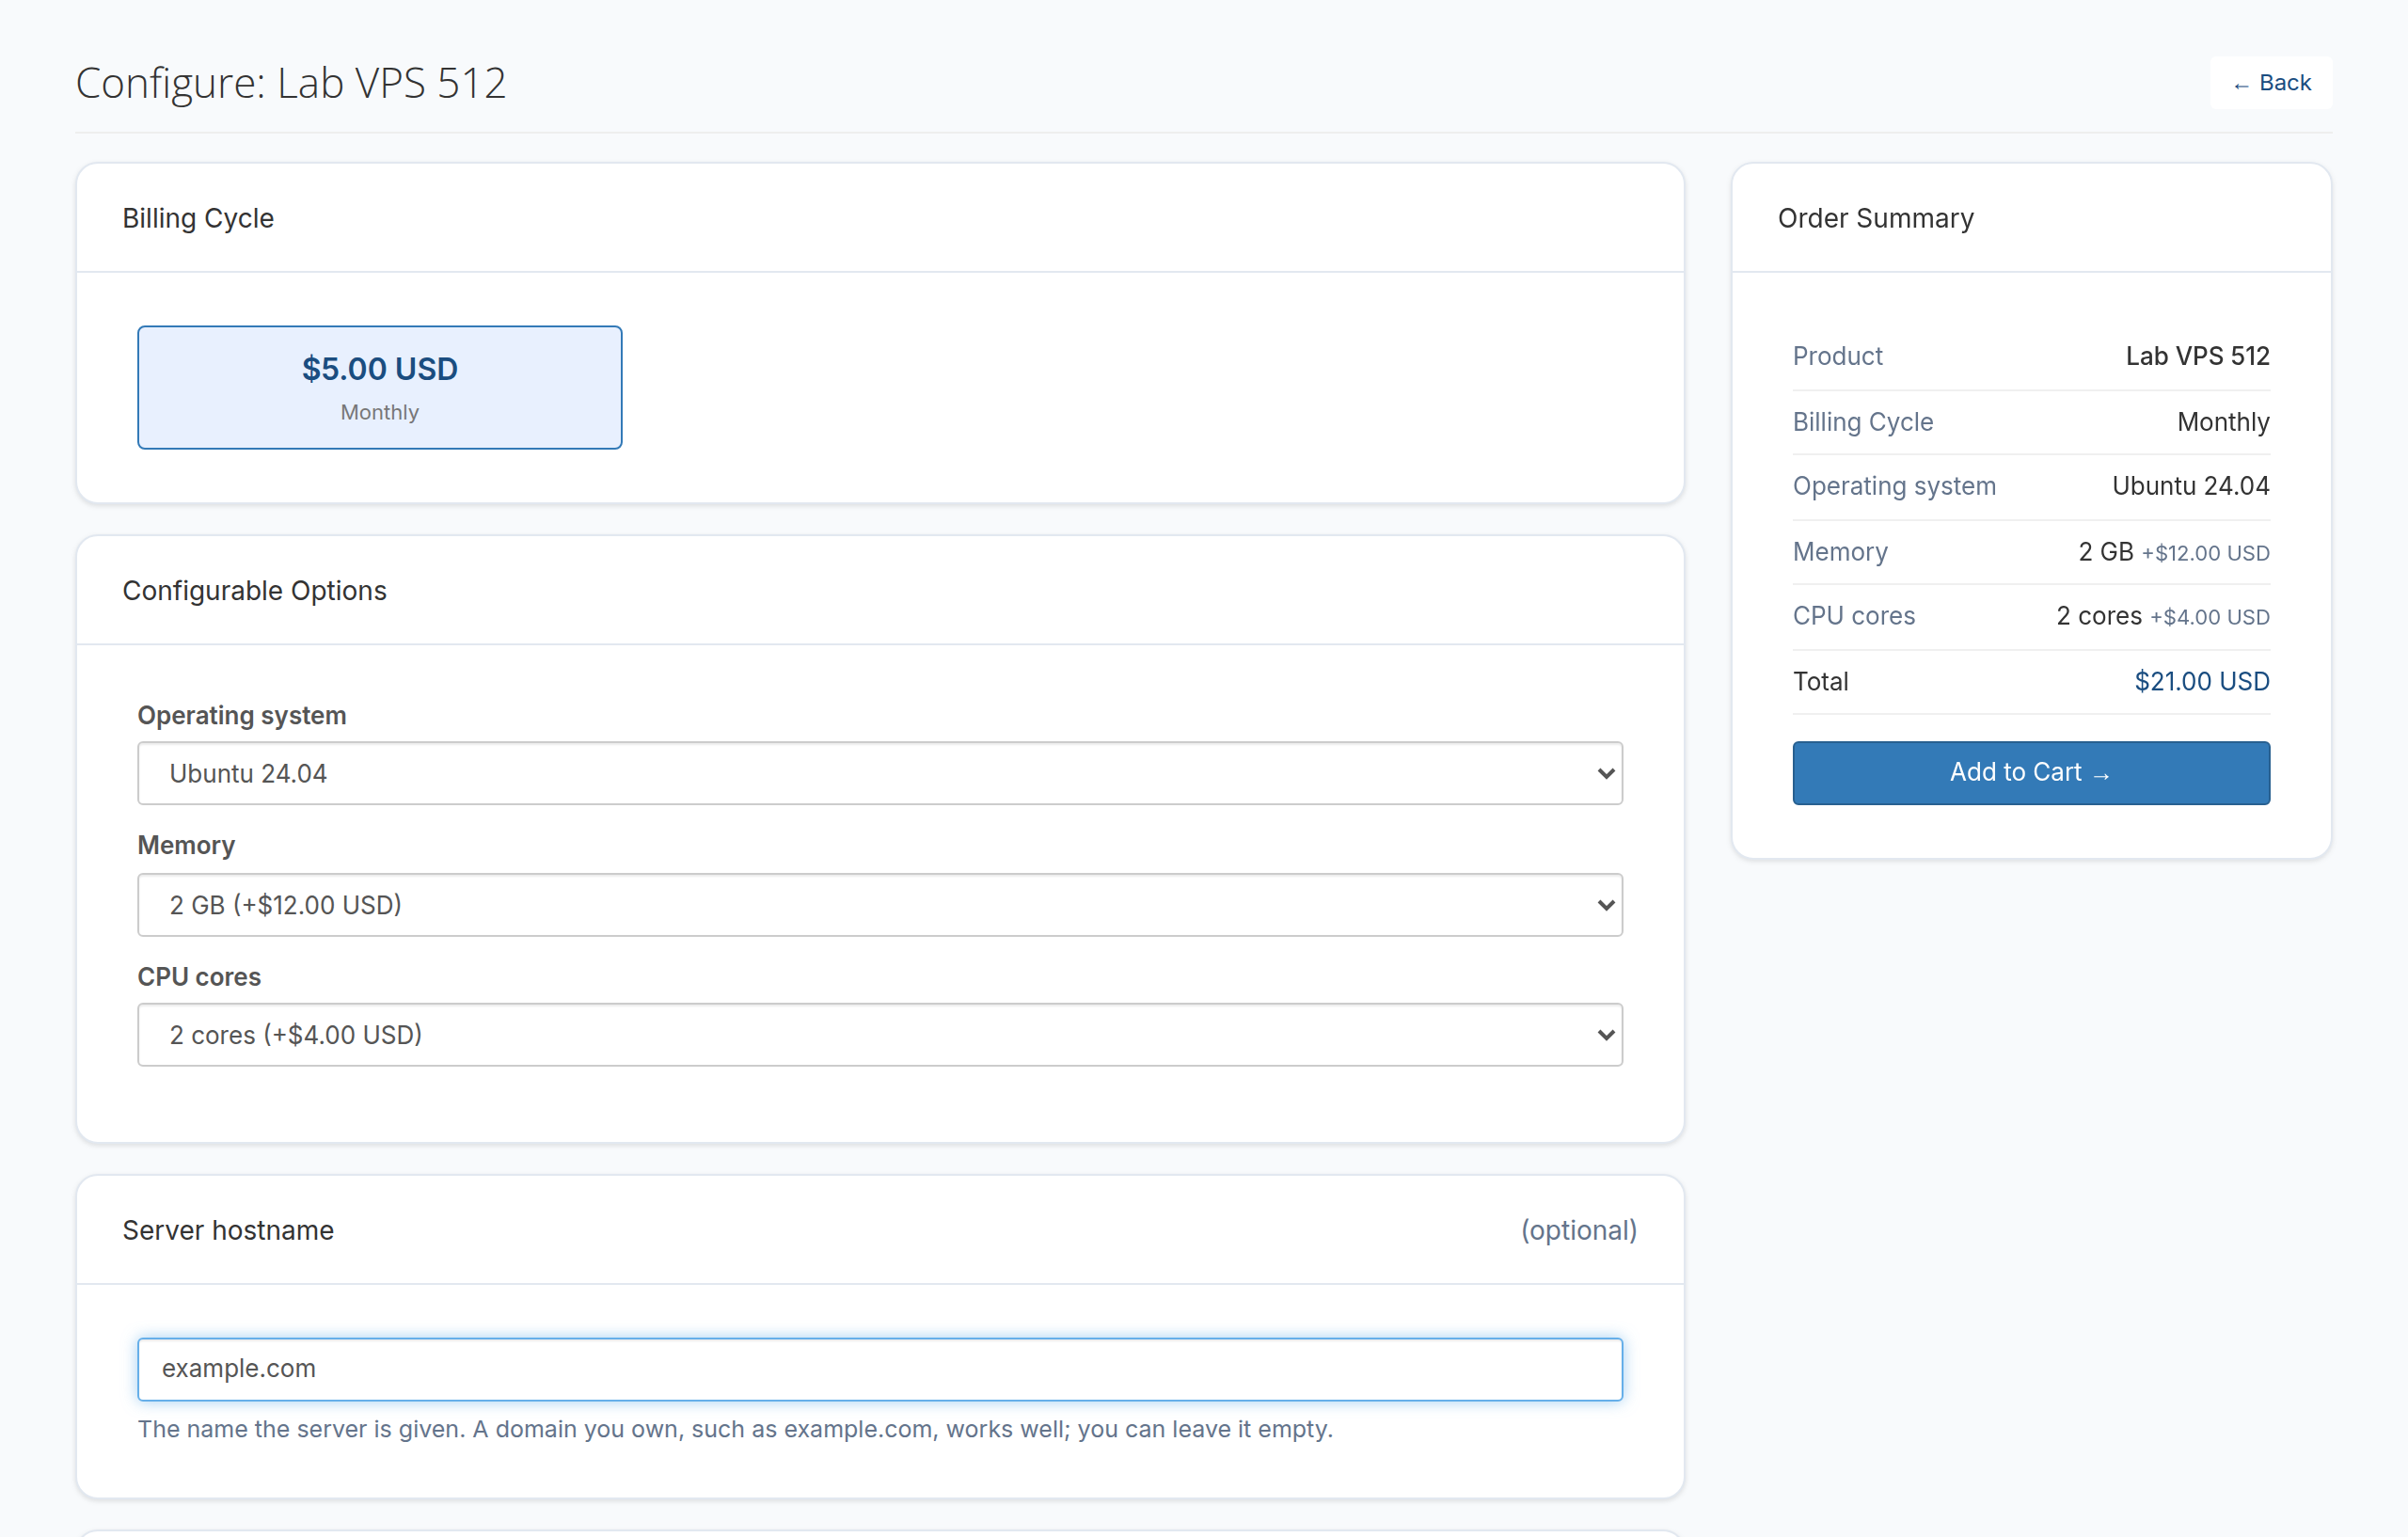
- the options with their prices for the chosen billing cycle;
- a running summary with each choice and the total;
- Server hostname instead of the domain-purchase box shown for web
hosting. It becomes the server's name; left empty, the server is named
vps-<VM id>.
Next: order it once yourself and look at the customer's panel.