2. Connect the server
Setup → Servers → Add Server, and choose Proxmox VE as the type. The form hides the nameserver fields (Proxmox needs none) and shows the Proxmox settings instead.
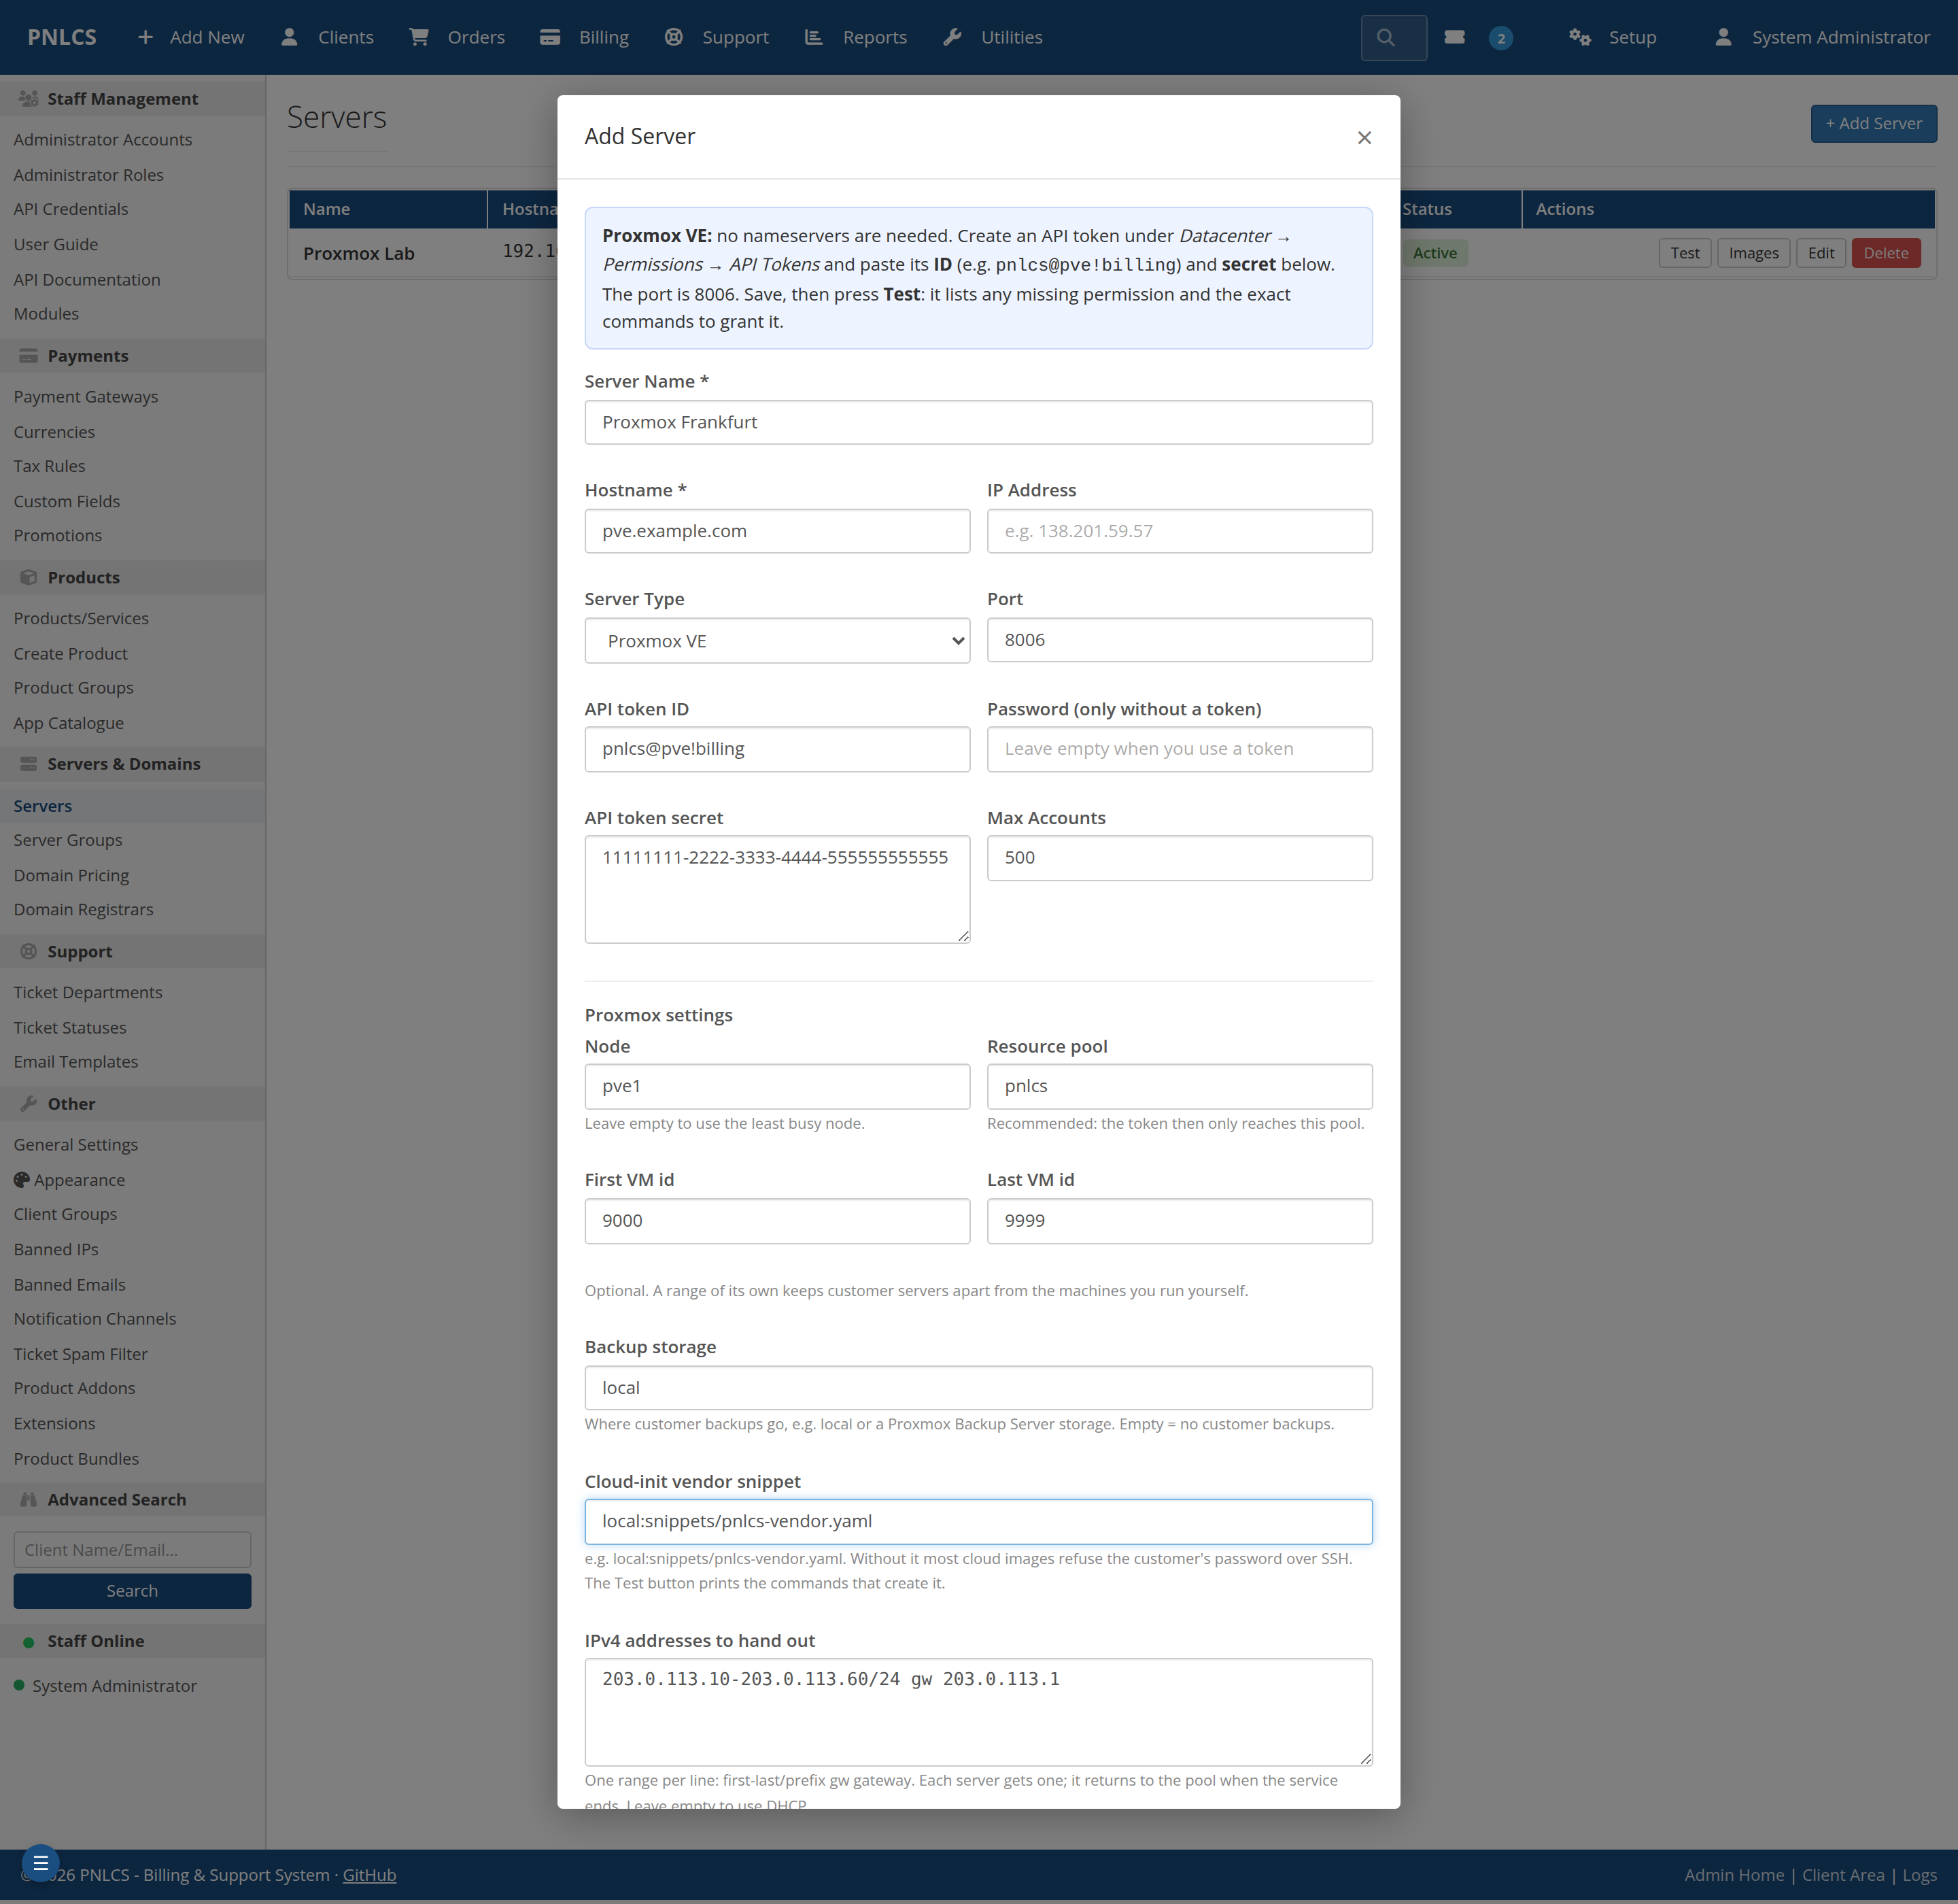
The fields
| Field | What to enter |
|---|---|
| Server Name | Any name you recognise, e.g. Proxmox Frankfurt. Customers see it on their service page |
| Hostname | The address of the Proxmox host or of any node in the cluster, e.g. pve.example.com |
| Port | 8006 (filled in for you) |
| API token ID | pnlcs@pve!billing — user, realm, !, token name |
| API token secret | The UUID Proxmox printed once. Pasting the whole PVEAPIToken=pnlcs@pve!billing=… line, or the ID and secret side by side as Proxmox shows them, works too |
| Password | Only if you sign in with a user and password instead of a token. Leave it empty with a token |
| Node | Optional. Empty: each new server goes to the online node with the most free memory |
| Resource pool | pnlcs — recommended: servers go into it, and the token reaches only it |
| First / Last VM id | Optional, e.g. 9000–9999. Customer servers take ids from the bottom of the range, templates made by the image library from the top, and nothing outside it is used |
| Backup storage | Where customer backups go, e.g. local or a Proxmox Backup Server storage. Empty: no customer backups |
| Cloud-init vendor snippet | local:snippets/pnlcs-vendor.yaml (see step 1) |
| IPv4 addresses to hand out | Optional ranges, one per line: 203.0.113.10-203.0.113.60/24 gw 203.0.113.1. Empty: DHCP |
| Check the Proxmox TLS certificate | Tick only if the host has a certificate your billing server trusts (Let's Encrypt, for example). The default self-signed certificate would fail |
Save.
Press Test
Test next to the server does much more than check the password. It reads the token's real permissions where PNLCS will use them and reports, line by line:
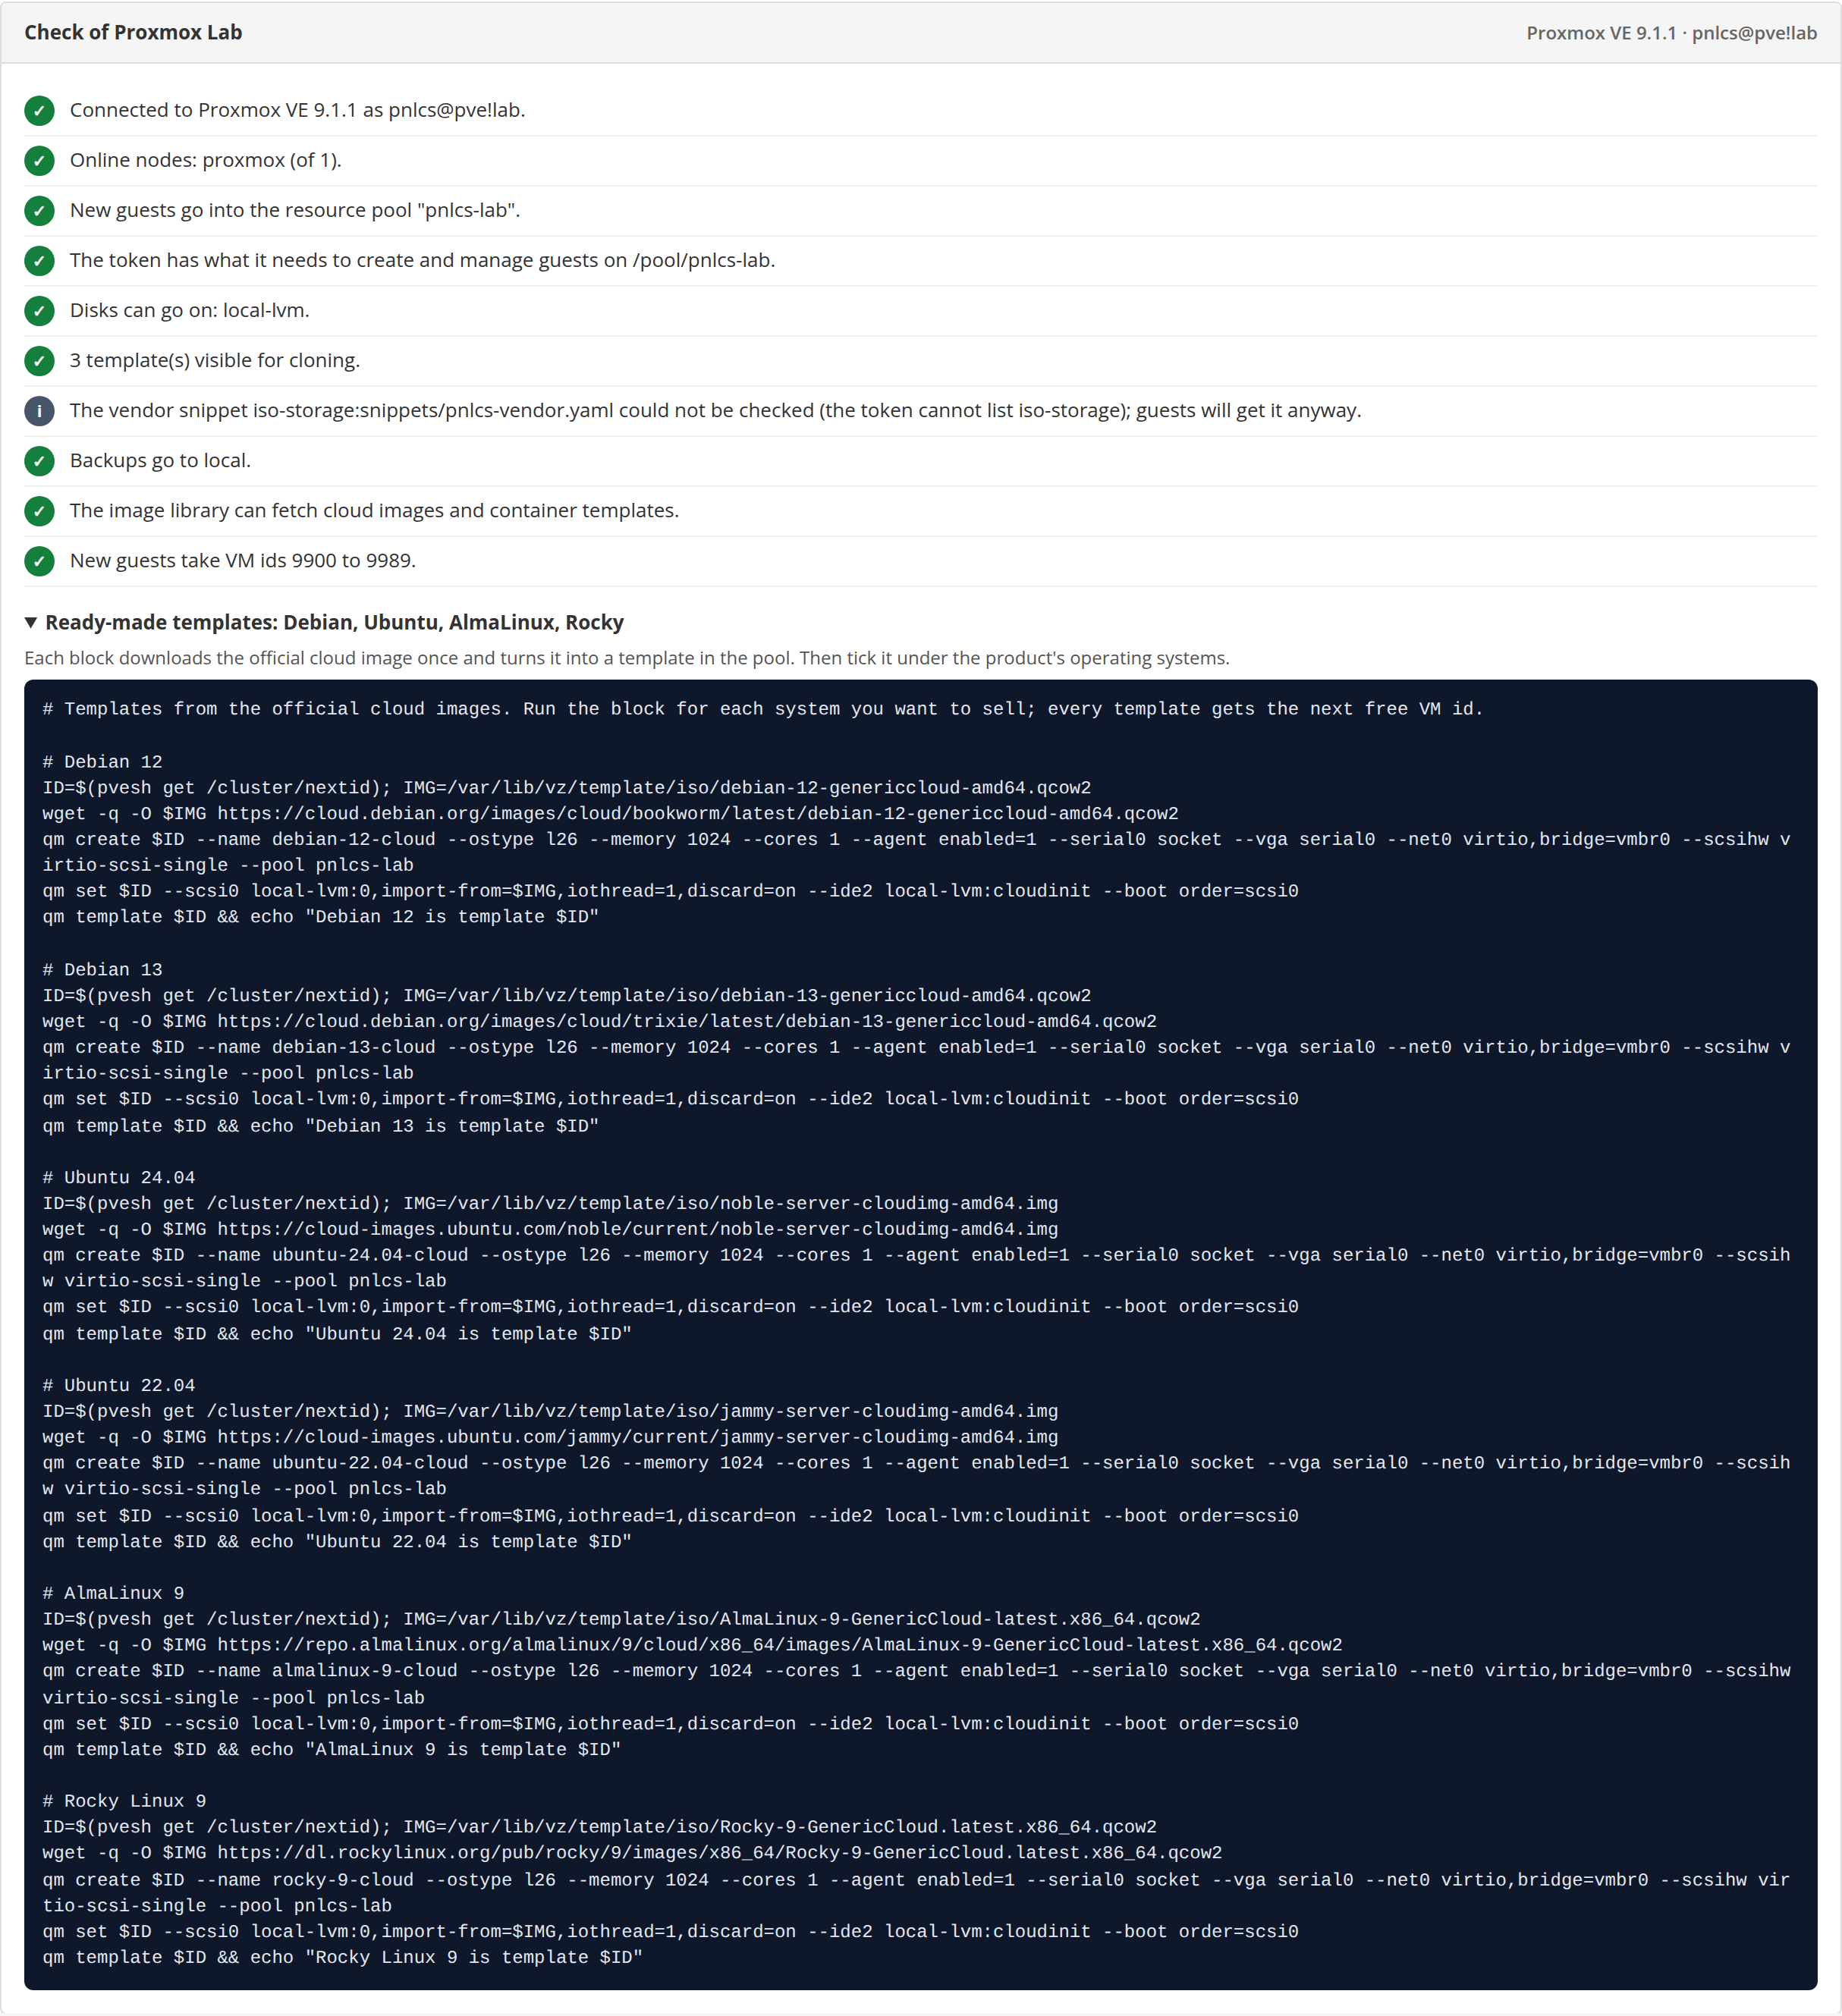
- the Proxmox version and who PNLCS is signed in as;
- a token that signs in but has no permissions (privilege separation);
- the nodes that are online, and whether the node you set exists;
- the pool, and whether the token has every right it needs on it — the missing ones by name, and what each one switches off;
- rights that are more than billing needs (
Sys.Modify,Permissions.Modify, …); - which storages new disks can go on, and whether the token may use a
bridge (
SDN.Use, needed since Proxmox 8); - how many templates the token can see;
- whether the vendor snippet exists, the backup storage accepts backups, and the image library may download;
- the VM id range and how many pool addresses are free.
Anything that needs fixing comes with a "Fix it on the Proxmox host"
block: the exact pveum / pvesm commands for your pool, storages and node,
with a Copy button. Run them in the host's shell and press Test again.
Under Ready-made templates the report also prints shell recipes that turn the official Debian 12/13, Ubuntu 24.04/22.04, AlmaLinux 9 and Rocky 9 cloud images into templates — the same thing the image library does from the admin panel in the next step.
Several hosts
Add each standalone Proxmox host as its own server. A cluster is one server: enter the address of any of its nodes. To sell from several servers under one product, put them in a server group (Setup → Server Groups) and point the product at the group.
Next: install operating systems.